Mid Life Crisis
The story continues... |
After a another couple of weeks work, it was time
to put the skirt on. This took a couple of hours with
some help from a friend. “Let's fill it up with
fuel, and start the engine” he said. So that's
what we did. And it started. First time. The first
hover was literally just up and down on the roadway
(not a public road, I should mention) outside the
house. The usual sort of problems showed up : a connection
to the oil injection tank leaked, and the engine exhaust
gas and cylinder temperature gauge didn't work. The
oil leak needed a new hose clip, and the gauge was
cross wired by the fool who wired the instrument panel
(me).
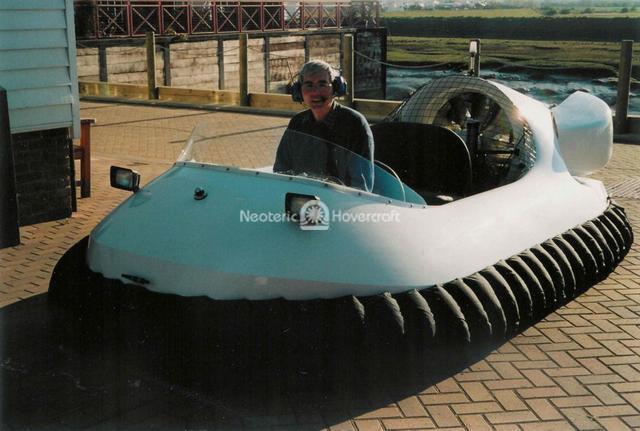
A short time later, and it was out to sea for the
first time, a slightly worrying experience for a novice
pilot, but interesting, nevertheless. The craft performs
exactly as advertised. Nothing fell off, came loose
or gave any cause for concern, unlike the pilot, who
still needs a lot more experience.....
The slipway by the house is narrow and steep, and
whilst going down it was easy, getting back up involved
full power with someone pushing the craft as well,
as due to the width of creek, its more or less impossible
to get up any speed when approaching the slip. The
width (about 3 metres or 10 feet, between high quay
walls) also made approaching at speed rather a dumb
thing to do.
However, about 500 metres further down the creek is
a marina with a nice, wide and gently sloping slipway,
and I'm pleased to say that negotiations to use this
one instead have been successfully concluded.
Just waiting for the gales to blow themselves out,
and then its back to the water.
Nigel
Original Entry - Mid-Life Crisis
“Dearest, I think a hovercraft would be really
great on all these mudflats, much better than a boat.
The tide's always out you see, and you'd never get
a chance to use a boat, whilst a hovercraft....”
“Well, possibly, but only if you call it MID
LIFE CRISIS”
That's more or less how the project got started.
March 2003 saw me visiting Neoteric in Terra Haute,
using up lots of accumulated frequent flyer miles
to get the trip across from the UK for free. One
day with Chris Fitzgerald and his team had me hooked
– after a couple of hours on the Wabash river,
I placed an order for a Hovertrek deluxe with the
Hirth fuel injected engine. I've been a fan of fuel
injection ever since I had a Lotus sports car with
twin Dellorto carbs which were permanently out of
tune. (it was probably nothing to do with the carbs,
but thats another story)
Chris got a rush of orders around that time, and
the craft wasn't ready until late August, by which
time I was off driving the Silk Roads across China
for two months, so eventually it was shipped mid
October, arriving at the end of the month exactly
on my birthday, how did you know, Chris ?
I bought the craft with its trailer, but without
the US standard tow hitch and electrical system,
as both would be illegal in the UK. Neoteric simply
put all the parts in the hull, and strapped everything
down with the cover. The craft and contents were
then winched onto the trailer, and the whole lot
simply pushed into a standard 20' shipping container.
The container was unloaded and transferred to the
shipping company's depot in less than 48 hours,
so my first problem was how to get a non –
towable trailer from a depot about 90 miles away
to the assembly “workshop” (OK, two
car garage). This was easily solved by hiring a
flatbed car recovery truck and driver, who for about
$150 collected the trailer and craft and delivered
it a couple of hours later.
John – he lives next door, has a boat called
“The Oldie” and makes several appearances
in this epic – rushed out, and helped me unload
the boxes. At this point, you have heaps and heaps
of stuff. Much doesn't make a great deal of sense.
I tried checking to see if everything was there,
but gave up, because there isn't a parts list, but
I found all the big bits. Well, not all, I couldn't
find the windscreen or the skirt retention strips.
These are (a) pretty large, and (b) rather fundamental.
In fact they were there, but because they are quite
long they had been slipped into the port lift duct.
Only took a day to find them...
Nothing then happened for a couple of months, due
to illness in the family, but around Christmas a
start was finally made. The first hole you drill
is the worst. The second isn't much better, but
by the time you've done a hundred or so, you get
blasé about drilling this shiny new fibreglass
tub thing you've just bought. Like Dave Reyburn,
the first contributor to the Hovergarage, (thanks
for all your advice Dave, your contribution has
been really useful) my first job was to install
the skirt retention strip. I treated myself to a
small compressor and an air riveter, which made
this job really easy and kept my hands soft. If
you work on a computer all week as I do, your hands
don't take to hand popping 3/16 inch rivets without
blisters.
By the way, don't look at the video on this one,
its now completely different. I did, and started
incorrectly, but it all came out right in the end.
Actually, so much has changed that I personally
found the video not very helpful, and it can now
be rather misleading. My way of working was to look
at the parts, look at the instruction book, which
is brief in the extreme, and only if I couldn't
work out what was required, look at the video. At
this point the video invariably seemed to be using
parts I hadn't got, so it was an email to Chris
instead.
The first small problem happened at this time: the
fact that the craft was mostly Imperial in its fittings.
The 3/16 inch rivets used in the skirt retention
strip are actually a snug fit on a 4.8mm drill,
which my extended metric set happened to have, but
I was lucky with this. In the end I bought a set
of imperial drills from a specialist supplier. Only
when I got to the end of the job, at the bottom
of a box full of electrical bits and pieces, did
I find that Neoteric had actually thrown in a 1/4”
and a 3/16” drill.
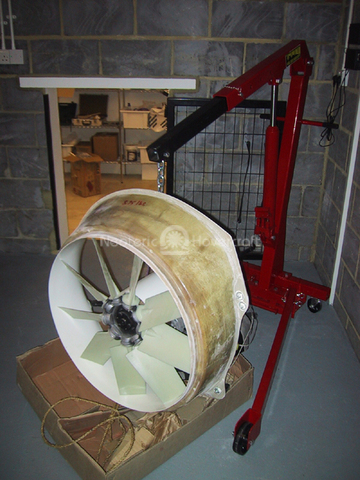
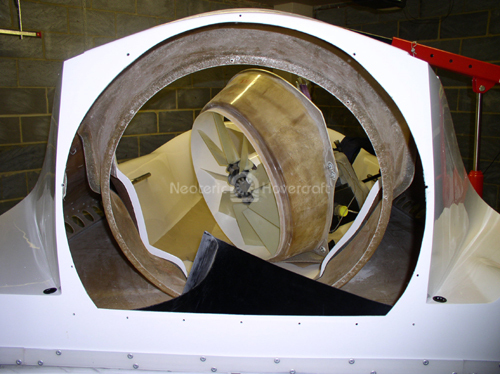
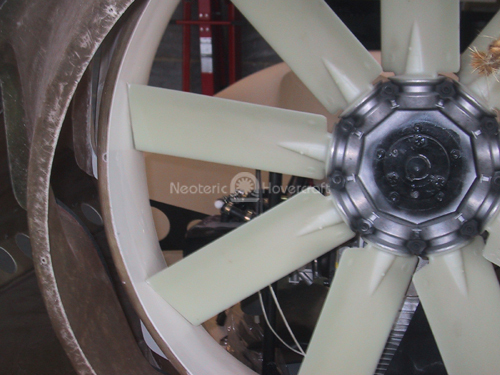
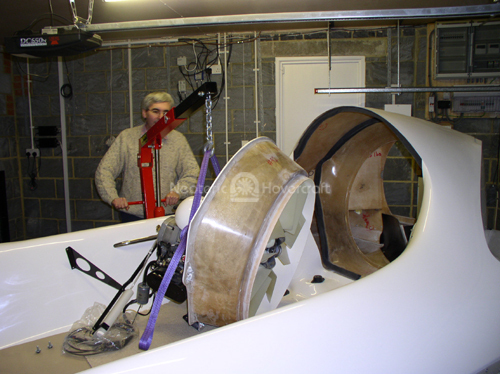
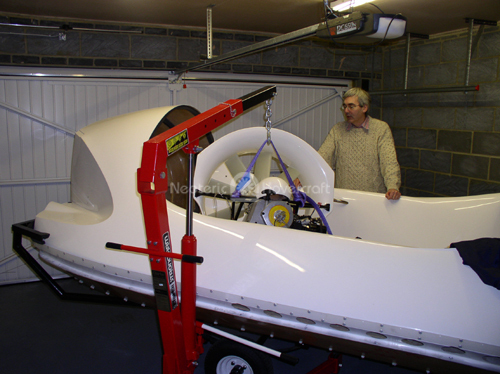
Next job was taking out the engine, and mounting
and bonding the lift duct air splitter. I used an
engine hoist, and guess what – the trailer
wheel gets in the way of the hoist leg, just like
Dave Reyburn said. The engine came out OK, and the
lift duct splitter fitted without problem, but getting
the engine back in took the combined efforts of
John and myself for what seemed like hours, with
much old fashioned British cursing of all things
foreign. The engine mount spacing washers in particular
were difficult, invariably slipping out just as
you thought you'd lined everything up. At this point
you have to ignore the video again, as the engine
fixing has been greatly simplified, using the thrust
bell housing, although John & I did manage to
push one of the well nuts right through its mounting
hole. Fished it out again with a pair of fine long
nose pliers, and it all went in properly the second
of third time.
 |
|
I then decided to drill all the big holes, mostly
because this makes a lot of dust, which its nice
to get out of the way early on. The large holes
for the instruments and tacho were made using hole
saws, which over here all seem to be metric equivalents
of imperial sizes so there was no problem in finding
the right saw for the job. The smaller holes for
the switches were drilled using a conical “sheet
metal” drill. These are stepless, cone shaped
bits which can drill almost any size hole in thin
materials. The advantage is that the hole is very
clean, with no cracking of the gel coat around the
hole. Disadvantage is that the hole is as big as
you make it, so you have to go slowly, fitting the
part all the time. I'd recommend this way though,
its much less stressful on the material than an
ordinary large diameter drill bit.
 |
|
Neoteric have marked out many of the drilling locations,
but they can be difficult to see. I found a soft
pencil rubbed over the marks helpful.
Instruments and handles were uneventful, although
I was a bit surprised to see the tacho reading 1500
rpm, without being connected to anything. I am assured
this is normal. Reverse thrust buckets also went
in fairly easily, although there was a bit of straining
to get the starboard bucket clear of the exhaust
“bump”. The actuators seemed very stiff
when they were first installed, but this could have
been a lack of lubrication, and also that the garage
was only just above freezing when I was working
on them. They are much easier now. The cables from
the actuators don't now go to terminal blocks in
the lift duct, but are directly soldered to the
cable from the bucket controllers. Each soldered
joint was insulated with heatshrink, and then then
the entire cable covered with a glue filled heatshrink
tube, which forms a watertight seal after shrinking.
John & I fitted the exhaust. On the Hirth engine,
this is different to the funny bent sausage thing
the Fujitsu engine uses, and looks much more like
a proper silencer. Fitting the bell joint to the
exhaust and its retaining springs is a dangerous
occupation, which almost certainly contravenes all
European health and safety regulations. Those springs
are lethal. Again, use of large pliers, screwdrivers
and lots of sticking plaster (on John and myself)
and eventually the job was done.
The actual silencer bit fitted easily. Both the
manual and video are incorrect here – the
Hirth silencer doesn't use the predrilled plate
or the heat shield, the tail pipe simply sticks
out of the hole in the hull, using the steel wool
and mounting flange.
The seats went in next. Rear seat was easy, the
front not too bad, but here is my only real engineering
gripe with Neoteric – the location of the
holes you have to drill and tap for the front seat
wheels. I drilled and tapped at the marked locations
(had to buy an imperial tap set as well), only to
find that the seat was “too high” and
the rearmost of the two sliders couldn't be closed,
and that the roller didn't make contact with the
slider bar.
After much measuring, I found that whatever I did,
it just wasn't going to work. I couldn't raise the
wheel positions enough to get the rearmost slider
to work properly, as the seat frame is only about
1/4” off the floor of the craft as it is.
My solution was to leave the seat wheels where they
were, and to modify the slider, using spacers made
out of 1/2” thick aluminium bar and longer
stainless steel bolts. It all works well enough
now, and is very stable.
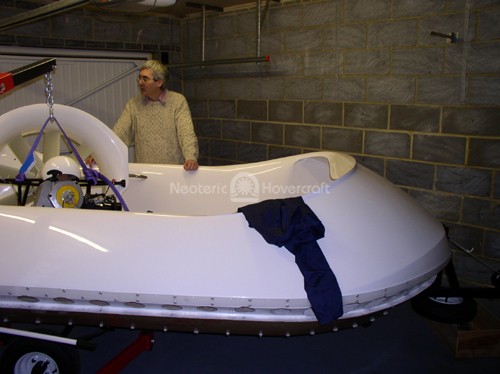
The rest of the mechanical components fitted in
well enough, including the glove boxes, which caused
much merriment by having two cup holders in each
– it being part of European folk lore that
in the USA products are solely judged by the number
of cupholders they have.
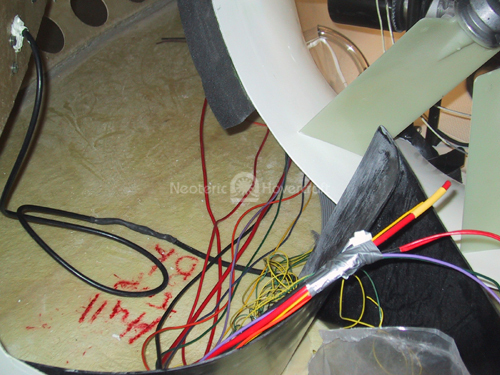
Next thing was the electrics. Now I have (a) the
deluxe Hovertrek with reverse thrust buckets, (b)
a salt water package and (c) a fuel injected Hirth
engine, complete with an engine management computer.
This means that all references to the terminal blocks
on the engine are spurious, and you need to work
out which wire goes where. I needed Neoteric's help
with this, as there are two yellow wires coming
out of the Hirth engine, and even the Hirth manual
doesn't mention them. Chris, can you do a sketch
drawing for the next person ?
I'm afraid I didn't like the harness construction
used by Neoteric, so I redid most of this using
Raychem “Duraseal” connectors, which
are crimp connectors with glue filled heatshrink
sleeving. Once crimped and shrunk, you get a permanent
watertight connection. If you do this, its wise
to invest in a proper ratchet crimp tool.
I think this brings me up to date. I have spent
only around 4 hours per week – not really
more – since Christmas, and its now the end
of March. I think it needs about another 8 hours
work until the maiden flight. I have yet to order
the Mid Life Crisis decal, but I am still being
told I can't launch without it.
I'll keep you posted about the rest.
Nigel